Introduction

This will help you understand how to create a guide—the foundation of your work instructions.

  1. Click on the user menu on the top right corner of the site.
    • Click on the user menu on the top right corner of the site.

    • A list of options should appear on a drop-down menu.

  2. Select Create a Page from the drop-down menu.
    • Select Create a Page from the drop-down menu.

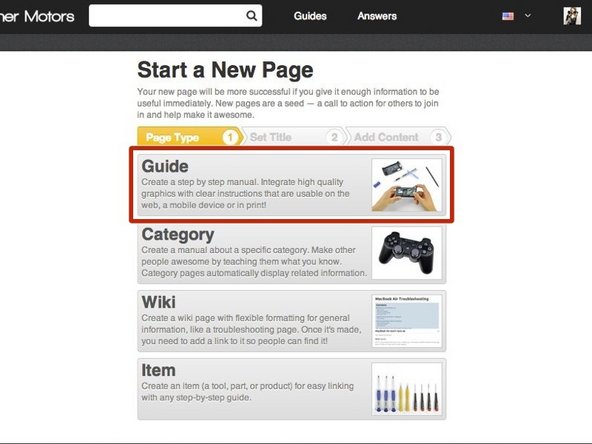
  3. You will be redirected to a page with options of four different page types that you can create.
    • You will be redirected to a page with options of four different page types that you can create.

    • Select Guide.

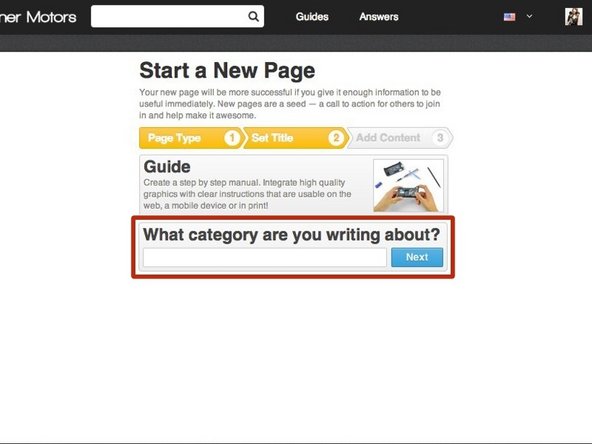
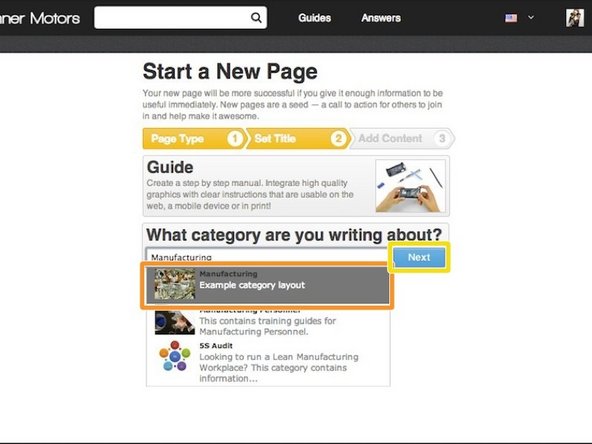
  4. Type the name of the category that you want the guide to be listed under. If the category is already created, it will appear in a drop-down menu below the text box.
    • Type the name of the category that you want the guide to be listed under.

    • If the category is already created, it will appear in a drop-down menu below the text box.

    • Select the category from the drop-down list.

    • Press Next.

  5. Give your guide a title.
    • Give your guide a title.

    • Add a summary about what the guide will accomplish.

    • If you would like to add other information at this time, such as an introduction or flags, press See More.

    • When finished adding information, press Save.

  6. Begin creating the body of your guide by inserting step-by-step instructions.
    • Begin creating the body of your guide by inserting step-by-step instructions.

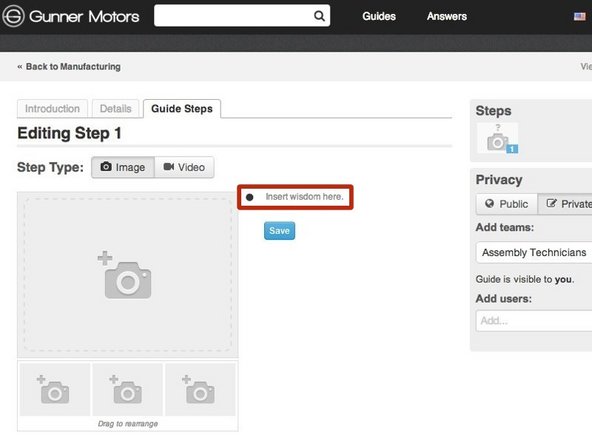
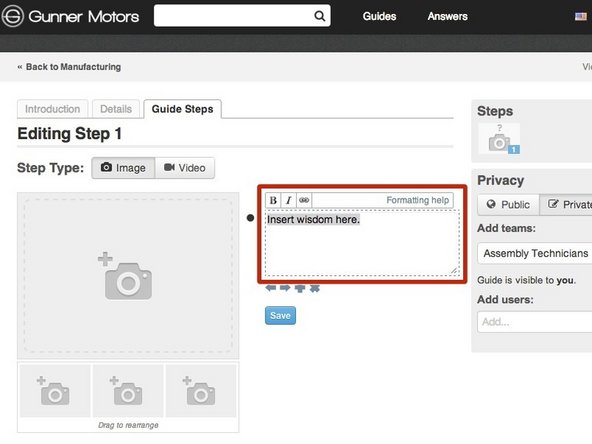
    • Click Insert Wisdom Here to select a bullet point to type in.

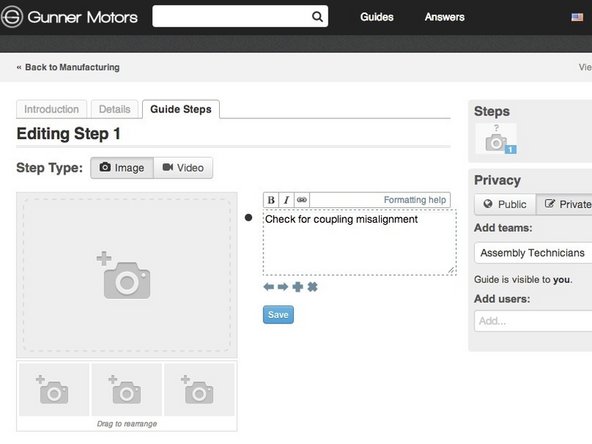
  7. Type instructions into the text box that appears. Type instructions into the text box that appears.
    • Type instructions into the text box that appears.

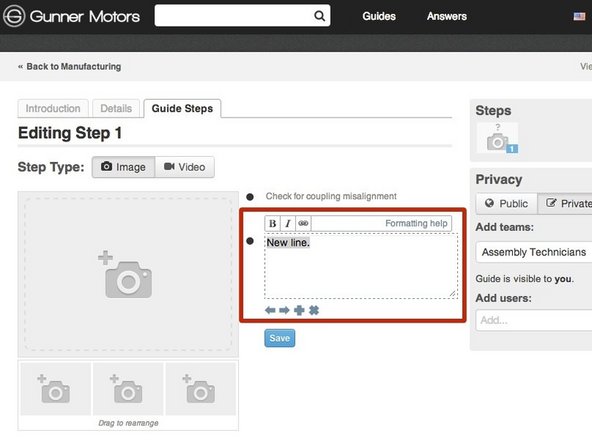
  8. To add another bullet point, press Enter while in the text box of a previous bullet point or press the + below the previous text box. Type all of the information that you need for this step into bullets. For additional formatting of bullets, such as making them colored or a symbol, see [invalid guide link].
    • To add another bullet point, press Enter while in the text box of a previous bullet point or press the + below the previous text box.

    • Type all of the information that you need for this step into bullets.

    • For additional formatting of bullets, such as making them colored or a symbol, see [invalid guide link].

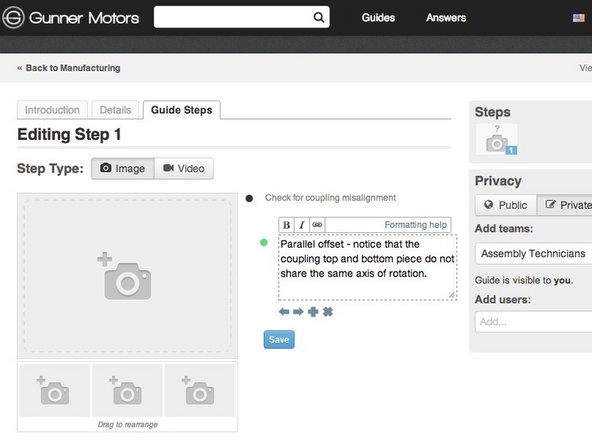
    • If you would like to indent a bullet, like shown in the picture, either click the right arrow below the text box or press tab.

    • When you are done adding information, press Save.

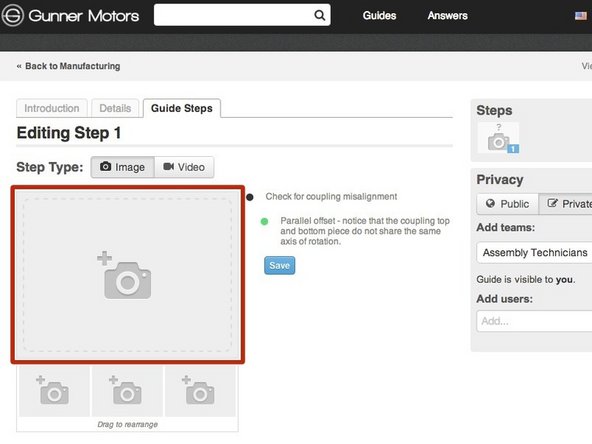
  9. Now that you have added written instructions, it's time to add visuals.
    • Now that you have added written instructions, it's time to add visuals.

    • Click on the the grey image placeholder next to the bullet points of information that you typed.

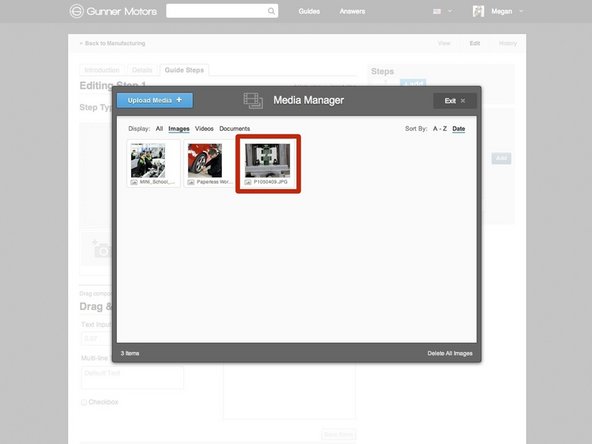
  10. When you click on the image placeholer, the Media Manager will pop up. For in depth instructions on how to use the Media Manager, see [invalid guide link].
    • When you click on the image placeholer, the Media Manager will pop up.

    • For in depth instructions on how to use the Media Manager, see [invalid guide link].

    • Choose a photo or video to insert by clicking on it.

    • All images must be at least 800 px by 600 px, and in 4:3 aspect ratio.

    • Press Save.

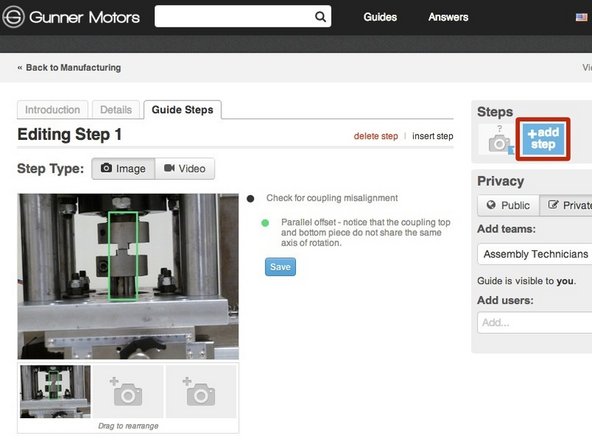
  11. To add another step to your guide, press the Add Step button.
    • To add another step to your guide, press the Add Step button.

    • Repeat [invalid guide link] through [invalid guide link] until all of your information is in the guide.

    • For further information on guides, please see the Dozuki Help Documentation about Guides.

Conclusion

To reassemble your device, follow these instructions in reverse order.

Terence Tam

Member since: 07/22/2015

2,025 Reputation

15 Guides authored

0 Comments

Add Comment

View Statistics:

Past 24 Hours: 0

Past 7 Days: 0

Past 30 Days: 0

All Time: 29