
Introduction
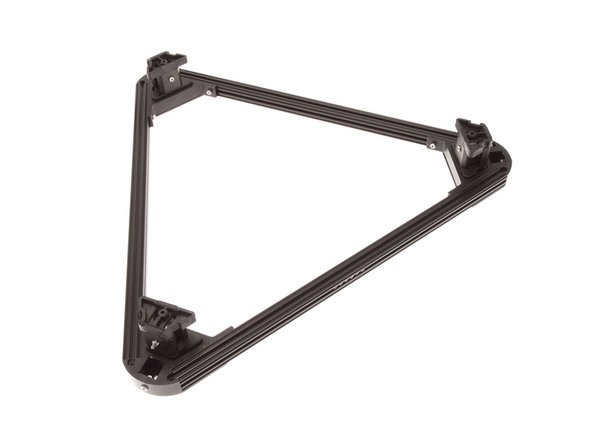
The Upper Triangle mounts the pulley idler blocks, allowing you to adjust the tension of the drive belts for each arm of the printer.
Along with the Lower Triangle and Drive Towers, the Upper Triangle forms the frame of the printer.
Tools
No tools specified.
Parts
-
-
The components referenced in this document comes from the following kits:
-
ZT-KIT-00116 - Chassis Upgrade Kit - Vertexes And Pulley Blocks
-
ZT-KIT-00153 - Kossel Sundries - Nut Spacers
-
ZT-KIT-00132 - Pulleys
-
ZT-KIT-00239 - Kossel Extrusions, Black
-
ZT-KIT-00187 / ZT-KIT-00188 - Mini Kossel Extrusions, Clear / Black
-
-
-
Like every T-Slot construction system, it is necessary to pre-plan the insertion of extra nuts for future expansion.
-
We suggest inserting a minimum of 6 M3 nuts, to allow for the addition of 2 OpenBeam brackets. You have been supplied with a copious amount of M3 nuts and you may insert more.
-
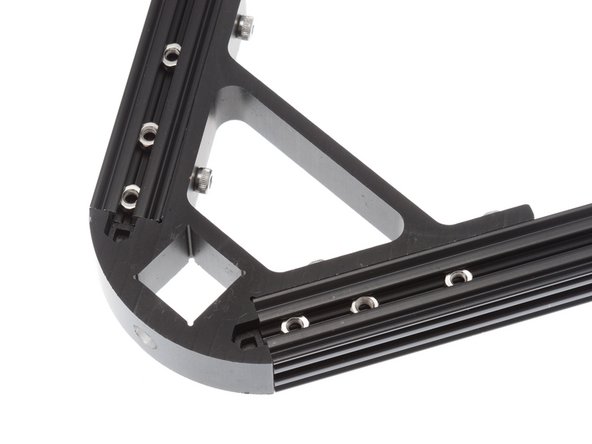
Using the provided set screws, secure the stack of nuts in the center of each extrusion face as shown on the right to prevent rattling and the nuts falling out while maneuvering the extrusion during the build process.
-
-
-
A set of laser cut nut spacers are included in your kit. These spacers positions the nuts at the correct spacing on the extrusion to allow for ease of assembly.
-
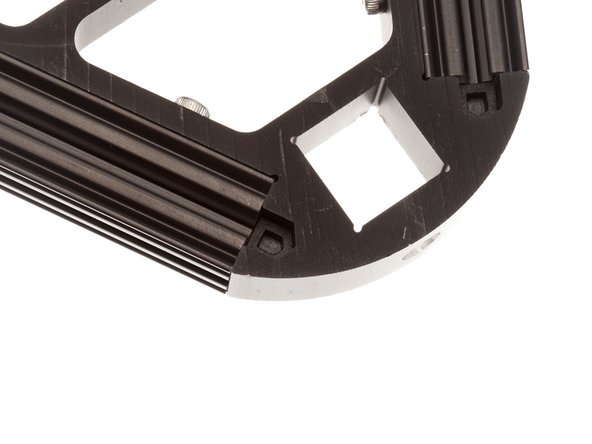
Kossel Pro Upper Vertex.
-
Kossel Pro Lower Vertex / Kossel Reprap Vertexes
-
Vertical Drive Tower
-
-
-
Remember to preload the nuts to the center of the extrusion, as almost all the channels are capped off after installation!
-
Install the spacer and nut stack as shown to the right, using the spacers meant for the Kossel Pro Lower Vertex, on both ends of each of the extrusions.
-
-
-
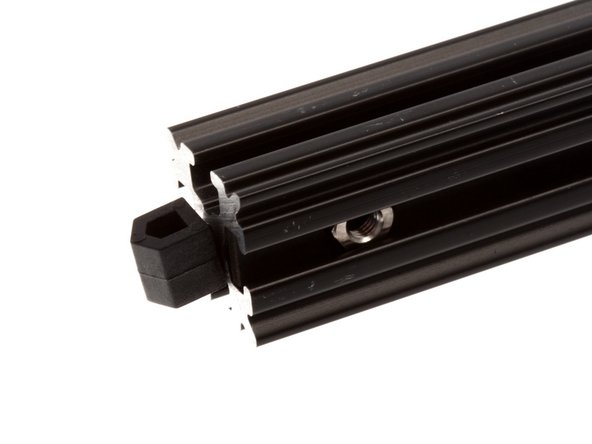
These Extrusion End Caps make it easier to load nuts into the channels.
-
Insert the pin on the extrusion end cap into the hole on the OpenBeam Extrusion as shown to the right.
-
-
-
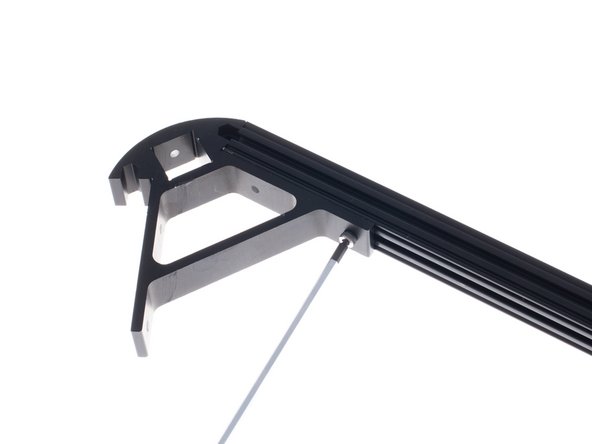
Carefully slide into Vertex.
-
Secure with 2x M3 x 8mm SHCS on each OpenBeam extrusion, 6 sides total, using the included ball-head 2.5mm hex driver.
-
Repeat for all 3 pieces of OpenBeam extrusion and all 3 vertexes.
-
-
-
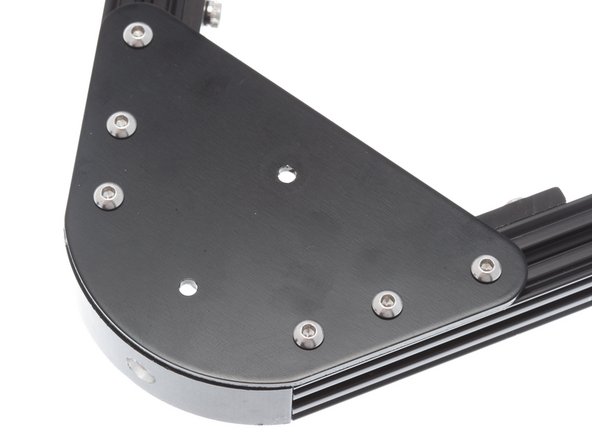
Using M3 x 6mm Button Head Cap Screws (BHCS), install vertex cap plates over the end of each vertex.
-
-
-
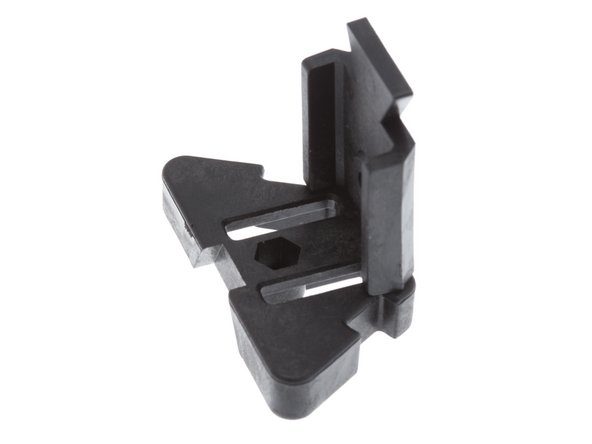
Insert an Idler Subassembly front/back into an Idler Subassembly top/bottom, with the nut cutout facing out and closer to the bottom.
-
Repeat to create a total of 3 subasssemblies.
-
-
-
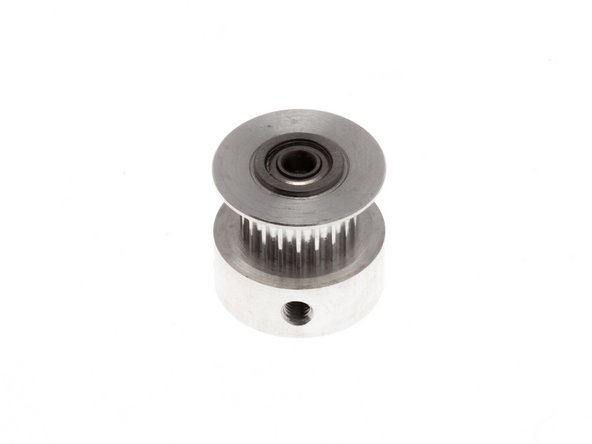
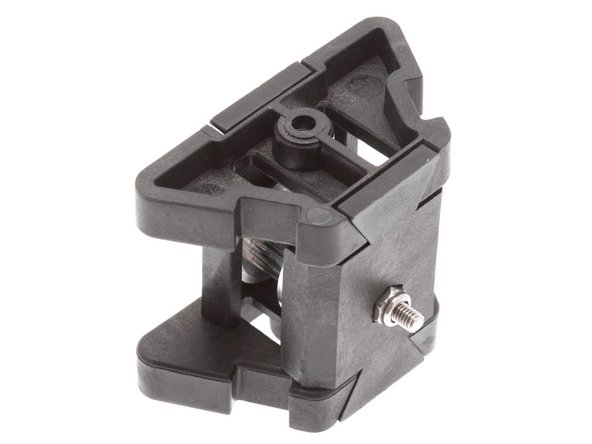
Insert an M3 30mm SHC Screw into the Idler Subassembly Front/Back, then slide a pulley onto it with the thick end facing the narrow side of the Idler Subassembly Top/Bottom.
-
-
-
Slide another Idler Subassembly Front/Back onto the screw. Follow that with an M3 Locknut.
-
-
-
Using one of the Idler Subassembly Top/Bottom that has had an M3 Locknut glued in place, add it to the top of the assembly and tighten the 30mm screw. Ensure that the pulley still spins freely.
-
Do Not Over Tighten The 30mm Screw!
-
-
-
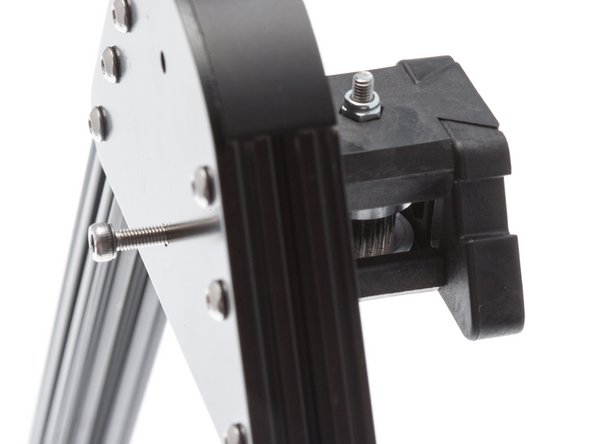
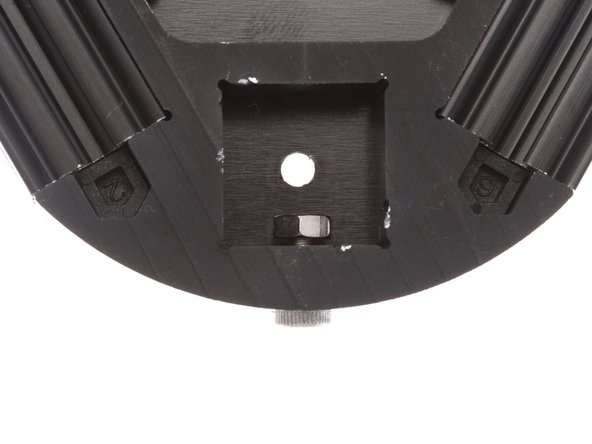
Slide an idler block into the vertex. There is only one way the assembly will fit. Make sure that the side with the Locknut is facing inward toward the vertex cap.
-
Using an M3 18mm SHC screw, loosely screw each of the idler blocks into the vertex caps.
-
-
-
Insert an M3 8mm SHC screw into each of the corner vertexes, while loosely tightening an M3 Nut on the inside.
-
Set the Upper Triangle aside, we'll use it during the final assembly.
-


Cancel: I did not complete this guide.
One other person completed this guide.
One Comment
Should Step 13 say M3 8mm screws to attach the idler blocks rather than M3 18mm? The bag ZT-ASY-00196 had 20mm screws and these would impinge on the idler pulleys if screwed in all the way. I used 8mm screws instead to attach the idler blocks.
-Dive
Dive Laser - Resolved on Release Reply